Introduction
Labor assignment is the core function that makes Dwarf Therapist worth using. The vanilla Dwarf Fortress interface handles individual labor changes reasonably well for small rosters, but the moment you need to assign the same set of labors to a dozen dwarves simultaneously, or audit which dwarves have a specific labor enabled across a population of eighty, the native interface becomes genuinely slow to work with.
Dwarf Therapist solves this through a visual grid where every dwarf is a row and every labor is a column. A single glance shows you the entire labor distribution across your fortress, and a few clicks can reassign multiple dwarves without navigating through individual unit menus. The process is straightforward once you understand the layout and the sequence of actions involved.
This guide walks through every step of assigning labors in Dwarf Therapist, from initial connection through batch assignment, role application, and confirming changes registered correctly in the game. It is written for players at all experience levels and applies to both the classic free version and the Steam Premium release of Dwarf Fortress.
All guidance is based on community-verified procedures and is intended for informational use.
Quick Facts about How to Assign Labors
- Dwarf Therapist assigns labors by writing changes to game memory in the running Dwarf Fortress process
- The labor grid displays every dwarf as a row and every available labor as a column with checkbox-style toggles
- Changes made in Dwarf Therapist take effect in the game but may require a brief unpause to register fully
- Batch assignment allows the same labor to be toggled across multiple selected dwarves simultaneously
- Custom roles group multiple labors into a named profile that can be applied to any dwarf in one action
- Sorting and filtering the dwarf list by skill level helps identify the best candidates for specific labor assignments
- Labor assignments made in Dwarf Therapist are reflected in the in-game unit labor panel and vice versa
- Assigning too many labors to a single dwarf reduces their efficiency as they constantly context-switch between tasks
- The tool must remain connected to an active game session for changes to persist correctly
- Always unpause the game briefly after making a batch of assignments to allow the game simulation to process the changes
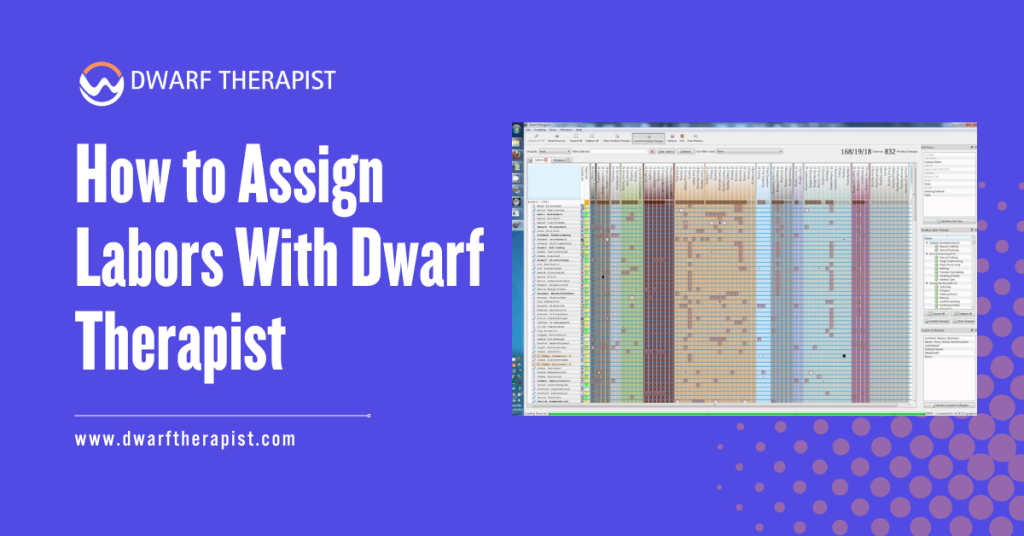
What the Dwarf Therapist Labor Grid Shows You
Reading the Grid Layout and Column Structure
When Dwarf Therapist successfully connects to a running fortress session, the main window displays a grid with your dwarf roster along the left side and labor categories spanning the columns to the right. Each intersection of a dwarf row and a labor column contains a checkbox or colored indicator showing whether that dwarf currently has that labor enabled.
The color and shading of grid cells carry meaning beyond simple on/off states. A filled or highlighted cell indicates an enabled labor. A cell that appears dimmed or empty indicates the labor is disabled for that dwarf. Some versions of Dwarf Therapist use additional color coding to indicate whether a dwarf is currently performing that labor, has a relevant skill for it, or is the best available candidate for it based on skill ranking.
Column headers display labor names, and clicking a header sorts the dwarf list by proficiency in that labor category, placing your most skilled candidates at the top. This sorting capability is one of the most useful features for efficient assignment, allowing you to immediately identify which dwarves are best suited for a specific role before making any changes.
Understanding Dwarf Rows and Skill Indicators
Each dwarf row displays the dwarf’s name, their current profession or role label, and a series of skill indicators alongside the labor checkboxes. The skill indicators show the dwarf’s current proficiency level in relevant areas, which helps distinguish between a dwarf with a high natural aptitude for a labor and one who has it enabled but has never practiced it.
Rows can be sorted by multiple criteria including name, profession, stress level, and individual skill values. For large fortress management, sorting by stress level before making labor changes helps identify dwarves who are already overburdened and should have labors removed rather than added.
Sorting by a specific skill column before assigning a specialized labor ensures the assignment goes to your most qualified candidates rather than whoever appears at the top of an unsorted list.
Clicking on a dwarf’s name row in most versions opens a summary panel showing that dwarf’s full current labor and skill profile. This is useful for reviewing an individual dwarf’s complete assignment state before making targeted changes without needing to scroll across the full column width of the grid.
How to Make Individual and Batch Labor Assignments
Assigning Labors to a Single Dwarf
Individual labor assignment in Dwarf Therapist is as direct as clicking the checkbox at the intersection of the dwarf’s row and the labor column you want to toggle. A single click enables a disabled labor or disables an enabled one. The change is written to game memory immediately and will be reflected in the in-game unit labor panel the next time the game processes that unit.
For focused individual assignments, the recommended workflow is to sort the dwarf list by the relevant skill column first, identify the dwarf you want to assign, then click directly on the labor cells you want to enable or disable in that dwarf’s row. There is no confirmation step and no save button. The change applies as soon as the cell is clicked.
Steps for assigning labors to a single dwarf:
- Confirm Dwarf Therapist is connected and the roster is populated with current dwarf data
- Click the column header for the labor you want to assign to sort by skill level in that category
- Locate the dwarf you want to assign in the sorted list
- Click the cell at the intersection of that dwarf’s row and the target labor column to enable it
- Click additional labor cells in the same row to enable or disable further labors for the same dwarf
- Unpause the game briefly after finishing to allow changes to register in the active simulation
Selecting Multiple Dwarves for Batch Assignment
Batch assignment is where Dwarf Therapist delivers its most significant advantage over the native interface. Selecting multiple dwarves simultaneously and applying a labor change to all of them at once compresses what would be dozens of individual menu navigations into a few clicks.
To select multiple dwarves, use standard Windows multi-selection controls. Holding Shift and clicking two rows selects all dwarves between them. Holding Control and clicking individual rows selects specific dwarves without selecting those between them.
Once multiple dwarves are selected, clicking a labor cell applies the change to all selected dwarves simultaneously rather than just the one whose row you clicked.
Common labor assignment problems and practical solutions:
- Labor change not appearing in the game after clicking Unpause the game for a few seconds after making assignments; some changes require a simulation tick to register fully
- Batch assignment applies to only one dwarf instead of all selected Confirm the selection is still active before clicking the labor cell; clicking elsewhere in the grid can deselect your multi-selection
- Assigned labor disappears shortly after being set The dwarf may have a conflicting job priority or a game-managed profession that automatically manages their labors; check the dwarf’s in-game profession settings
- Grid cells appear greyed out and unclickable Some labors are locked by noble or military status and cannot be freely toggled; these cells are intentionally restricted
- Changes made during a paused game do not register Unpause briefly after each batch of changes rather than making all assignments while the game remains paused for an extended period
- Dwarf Therapist shows a labor as enabled but the game shows it disabled A refresh is needed; trigger a manual refresh in Dwarf Therapist or wait for the next automatic refresh cycle to sync the display state with actual game data
- Selecting dwarves across a large list is slow Use the filter or sort function to group your target dwarves together before selecting; this reduces the range of the selection and speeds up the process
Using Roles to Streamline Labor Assignment
Creating and Applying Custom Labor Roles
Roles are named labor profiles that group multiple labors together under a single label. Instead of clicking individual labor cells for every dwarf in a migrant wave, you create a role called something like Farmer, Hauler, or Craftsdwarf that contains all the labors relevant to that type of dwarf, and then apply the role to any number of dwarves in one action.
Creating a role in Dwarf Therapist is done through the roles management panel, typically accessible from the main menu or a dedicated toolbar button, depending on your version.
The role editor presents the full labor list and allows you to mark which labors should be enabled and which should be disabled when the role is applied. You name the role, save it, and it becomes available as an option in the right-click context menu when dwarves are selected in the grid.
To apply a role to one or more dwarves, select the target dwarves using the standard multi-selection controls, right-click the selection, and choose the role you want to apply from the context menu. The tool applies all the labor enabled and disabled in the role to every selected dwarf simultaneously. A full migrant wave can be processed in under a minute once your standard roles are configured.
Building an Effective Role Library for Your Fortress
The roles you define should reflect the actual labor structure of your fortress rather than theoretical ideal assignments. A role that enables every crafting labor simultaneously creates a dwarf who will context-switch constantly between tasks and never develop deep skill in any single area. Roles designed around focused specializations produce more efficient dwarves with faster skill progression.
A practical starter role library for most fortresses covers four to six core categories. A dedicated miner role enables only mining and removes all other labors. A hauler role enables all hauling and cleaning labors while disabling everything that requires skill. A food production role covers farming, plant gathering, brewing, and cooking. A crafts role focuses on a specific workshop
type without enabling competing labors. Military dwarves typically have all civilian labors disabled to keep them available for combat response without getting pulled into workshop queues.
Players managing a fortress with specialized industries should create industry-specific roles that reflect their actual production chain rather than generic role categories. A fortress focused on metalworking benefits from a dedicated smelter role, a dedicated smith role, and a separate hauler role configured specifically to move ore and bars, rather than a single combined metalwork role that spreads individual dwarves across all three tasks simultaneously.
Confirming and Verifying Labor Assignments After Changes
Checking That Changes Registered Correctly in the Game
After making labor assignments in Dwarf Therapist, verifying that the changes registered correctly in the game is good practice, particularly for critical assignments in a fortress that depends on specific dwarves being available for specific tasks. The in-game unit labor panel and the Dwarf Therapist grid should reflect the same state after a brief unpause.
To verify in the game, select the dwarf whose labors you changed, navigate to their labor panel in the in-game unit menu, and confirm that the labors you enabled or disabled in Dwarf Therapist are shown in the matching state in the game. If they do not match, trigger a manual refresh in Dwarf Therapist and unpause the game for several more seconds before checking again.
Steps for post-assignment verification:
- Unpause the game for at least a few seconds after completing your assignments
- Select a sample of the dwarves you assigned in the game interface
- Open their labor panel and compare the current state against what you set in Dwarf Therapist
- If states do not match, trigger a manual refresh in Dwarf Therapist and allow another simulation cycle
- For batch assignments across many dwarves, verify a representative sample rather than every individual dwarf
Avoiding Common Over-Assignment Mistakes
One of the most practical benefits of the Dwarf Therapist grid is that it makes over-assignment immediately visible. A dwarf row with a dense cluster of enabled labor cells across many columns is a dwarf who has been given too many responsibilities and will spend most of their time walking between tasks rather than completing any of them efficiently.
Reviewing the grid periodically for dwarves with unusually high labor counts helps maintain a well-organized workforce. In general, non-specialist dwarves such as haulers benefit from broad labor enablement, while skilled specialists such as doctors, engravers, and weapon smiths perform better with most labors disabled so the game’s job priority system routes their time to their primary function.
Using the sort function to arrange dwarves by labor count, if your version supports it, surfaces the most over-assigned dwarves in the roster quickly. Addressing over-assignment proactively during quiet fortress periods is significantly easier than diagnosing productivity problems after they have already slowed construction or production output.
Frequently Asked Questions
Do labor changes in Dwarf Therapist take effect immediately in the game?
Changes are written to game memory as soon as you click a cell in the grid. However, the game’s simulation processes the change on the next active tick, so unpausing briefly after making assignments ensures the changes are fully recognized by the job assignment system.
Can I undo a labor assignment made in Dwarf Therapist?
There is no undo function within Dwarf Therapist. To reverse an assignment, click the same cell again to toggle the labor back to its previous state.
For batch reversals, re-select the affected dwarves and click the labor cell again to toggle the change across all of them.
How many labors should I assign to a typical dwarf?
This depends on the dwarf’s role. Dedicated specialists such as miners, doctors, or legendary craftsdwarves perform best with most labors disabled so they remain focused. General-purpose dwarves and haulers can carry a broader set without significant efficiency loss. Avoid enabling more than six to eight diverse labors on a single dwarf intended for skilled work.
What is the difference between enabling a labor and applying a role?
Enabling a labor toggles a single specific task on or off for a dwarf. Applying a role simultaneously sets multiple labors at once based on a pre-defined profile, enabling some and disabling others in a single action. Roles are more efficient for processing multiple dwarves who need a consistent labor set.
Why do some labor cells in the grid appear greyed out and refuse to toggle?
Some labors are managed automatically by the game based on a dwarf’s noble position, military status, or current active profession designation. These labors are intentionally restricted and cannot be freely toggled through Dwarf Therapist or the in-game labor panel while the relevant status is active.
Can I use Dwarf Therapist to assign labors to animals or non-dwarf units?
No. Dwarf Therapist reads and manages labor data for dwarf units specifically. Animals, pets, and non-dwarf intelligent units do not appear in the Dwarf Therapist roster and cannot be assigned labors through the tool.
Will applying a role overwrite existing individual labor settings on a dwarf?
Yes. When you apply a role, the role definition sets each labor it covers to the specified enabled or disabled state, replacing whatever was previously set for those labors.
Labors not covered by the role definition are left in their current state and are not changed by the role application.
Is there a way to see which dwarves are currently performing a labor rather than just having it enabled?
Some versions of Dwarf Therapist use cell color coding to distinguish between labors that are enabled and labors that are actively being performed at the moment of the last refresh.
A different shade or color in the cell indicates active task execution versus simple labor enablement. Refer to the color key in your specific version to interpret the distinction correctly.
Latest Post:
- How Dwarf Therapist Works (Labors, Skills & Assignments Explained)
- Dwarf Therapist Supported Versions (Steam & Classic)
- Dwarf Therapist Features You Should Know (Reports, Filters, Profiles)
- Is Dwarf Therapist Safe? Security, Mods & Stable Downloads
- Dwarf Therapist vs In‑Game Manager Tools (Pros & Cons)